Zoom Virtual Backgrounds
The virtual background feature allows you to display an image or video as your background during a Zoom Meeting. This feature works best with a green screen and uniform lighting, to allow Zoom to detect the difference between you and your background. The guide below will help you navigate adding a background to Zoom:
Installing a Zoom Virtual Background
To enable the Virtual Background feature for your own use:
- Sign in to the Zoom web portal.
- Click My Meeting Settings.
- Navigate to the Virtual Background option on the Meetingtab and verify that the setting is enabled.
Notes:
- If the setting is disabled, click the Status toggle to enable it. If a verification dialog displays, choose Turn On to verify the change.
- If the option is grayed out, it has been locked at either the Group or Account level, and you will need to contact your Zoom administrator.
- You must logout of the Zoom Desktop Client and login to it again for this setting to take effect.
How to use Virtual Background:
- Sign in to the Zoom desktop client.
- Click your profile picture then click Settings.
- Select Virtual Background.
Note: If you do not have the Virtual Background tab and you have enabled it on the web portal, sign out of the Zoom Desktop Client and sign in again. - Check I have a green screen if you have a physical green screen set up. You can then click on your video to select the correct color for the green screen.
- Click on an image to select the desired virtual background or add your own image by clicking + and choosing if you want to upload an image or a video. If prompted, click Download to download the package for virtual background without a green screen. Notes:
- Ensure that you are using a solid background color.
- After you select an option, that virtual background will display during your meetings.
- To disable Virtual Background, choose the option None.
USC Zoom Backgrounds for Download
The backgrounds below have been created by the university, to be added to Zoom:
Black Backgrounds
Gold Backgrounds
Cardinal Backgrounds
Grey Backgrounds
Spread Care Not COVID Backgrounds
Best Practices for Securing Zoom Meetings
Use these best practices to prevent Zoombombings and to ensure your meeting is secure.
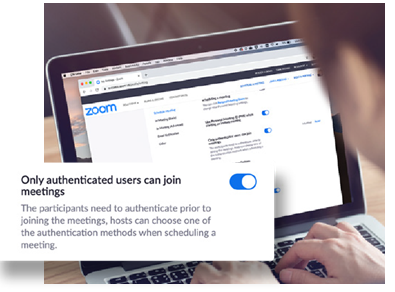
Only Allow Registered or Domain Verified Users
Zoom can also give you peace of mind by letting you know exactly who will be attending your meeting. When scheduling a meeting, you can require attendees to register with their e-mail, name, and custom questions. You can even customize your registration page with a banner and logo. By default, Zoom also restricts participants to those who are logged into Zoom. At USC, Zooms are automatically restricted to Zoom users who’s email address uses the USC domain.
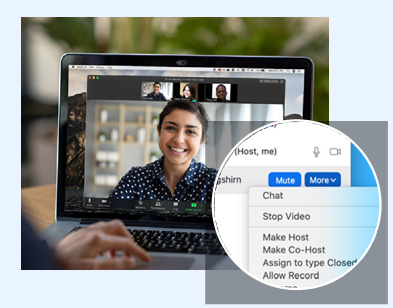
Make Someone a Co-Host
In a given meeting, hosts are the only ones with total control over a meeting. But what if you need a helping hand to manage all of your participants? You can promote a trusted meeting attendee (e.g. guest lecturer, teaching assistant) to Co-Host, allowing them many of the same privileges and control features available to the meeting host themselves. To learn about the difference between a host and a co-host, view this support article.
Additional Help and Support
Zoom Help Center
Whether you’re looking for technical documentation or a one minute quick start video, the Zoom Help Center has you covered with thousands of resources that are updated daily, so you can get your questions answered and keep Zooming.
Live/Recorded Trainings
Our Zoom experts host free and interactive live training webinars daily. Get up to speed on important topics in less than an hour. Just select the time zone that fits best for you when registering for one of our live training webinars.
View Live Trainings & Recordings
Zoom Blog
Want to stay up-to-date on everything happening in the Zoom community?
The Zoom blog offers daily stories on what’s new at Zoom, exciting updates, and innovative customer stories and use cases to keep you inspired and on the cutting edge.
Classroom Management Strategies
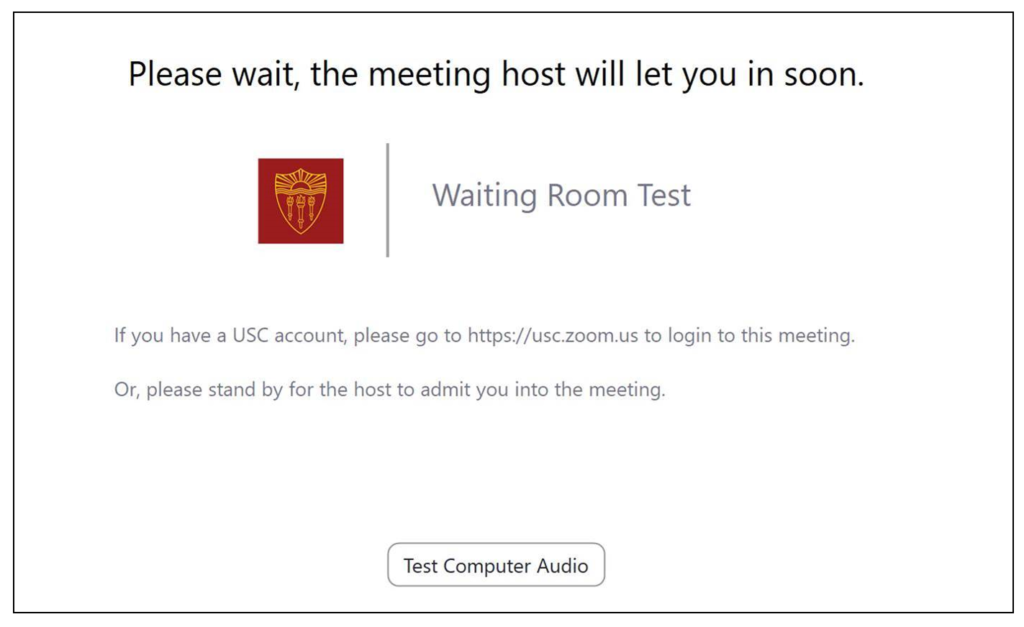
Waiting Room Message
Any participant who does not login using their USC Zoom credentials automatically will be placed in the Waiting Room. Here is the image that they will see when sitting in the Waiting Room.
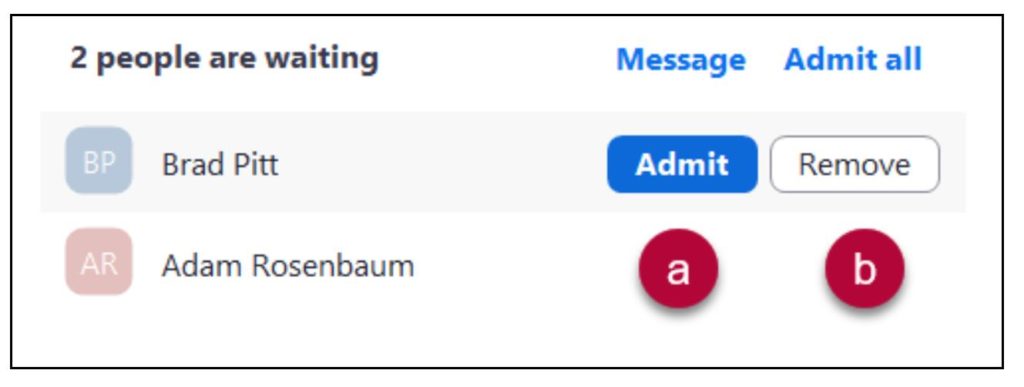
Waiting Room: Add or Remove Participants
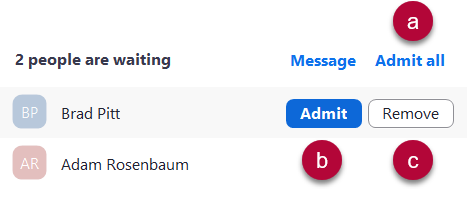
You have the following options when participants are in the Waiting Room. Note: It is not recommended that you use the Admit all feature as this may admit participants that should not be in your class.
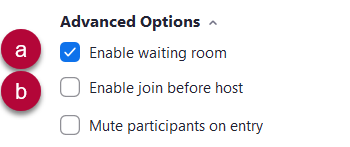
- Click Admit to allow a single participant into the meeting (a).
- Click Remove to remove a single participant from the Zoom meeting (b).
Zoom Meetings Set-Up in Brightspace
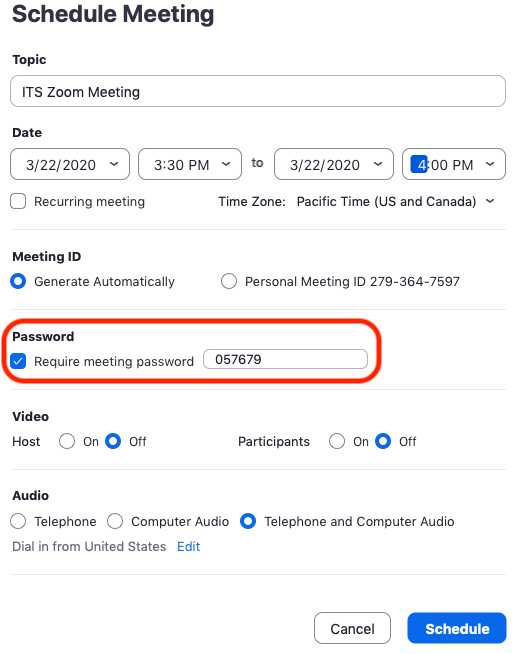
Set Password & Enable Waiting Room
There are two key features that enable you to further secure your meetings: Set Up Password and Enable Waiting Room. Set Up Password requires a participant to enter a password to enter the meeting. The Waiting Room feature allows you to control when a participant joins the meeting. These features will help prevent “zoombombing” of your classes. As host, you can admit attendees one by one or all at once.
Set Password & Enable Waiting Room in Brightspace
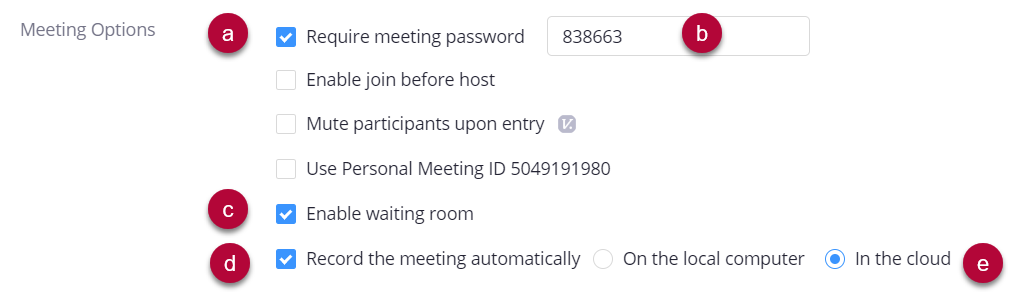
When scheduling a Zoom meeting in Brightspace ensure that you set the following meeting options:
- Select Require meeting password (a).
- Input a password or accept the randomly generated number from Brightspace (b).
- Select Enable waiting room (c).
- Select Record the meeting automatically (d).
- Select In the cloud (e).
Start Meeting with Waiting Room
- Start your meeting from the Brightspace and open the Zoom app when prompted.
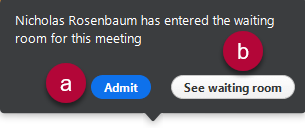
- As participants join the call, you will see a pop-up message:
- To admit a person directly, click Admit.
- To see all participants in the waiting room, click See waiting room.
- In the waiting room panel, perform one of the following:
- Click Admit All to admit all participants.
- Click Admit to allow a single participant into the meeting.
- Click Remove to remove a single participant from the Zoom meeting.
Managing a Meeting
Once the meeting has started, the meeting room is still active.
- If you wish to return a participant to the meeting room:
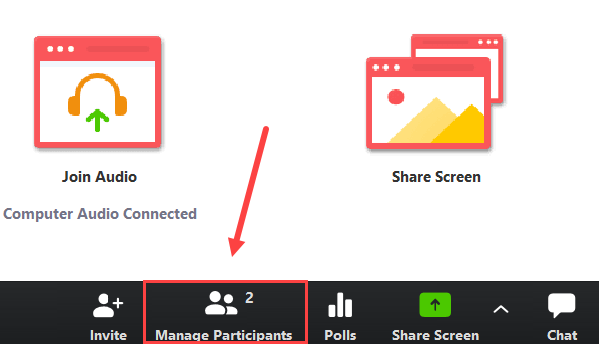
- Click Manage Participants.
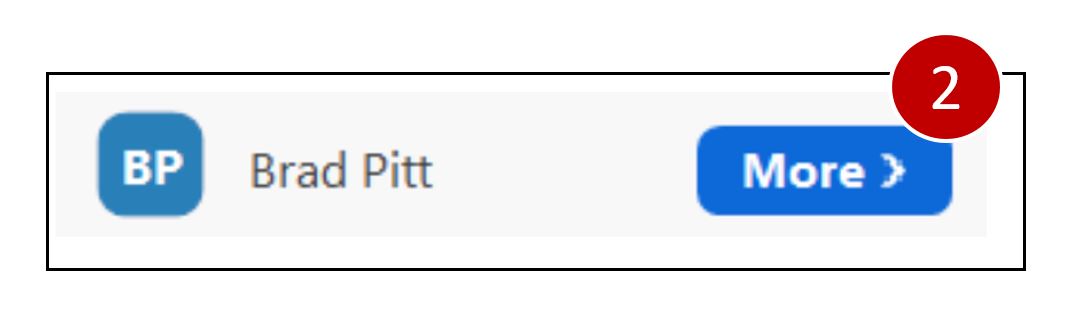
- In the Participants panel, place your mouse over the name of a person and click More.

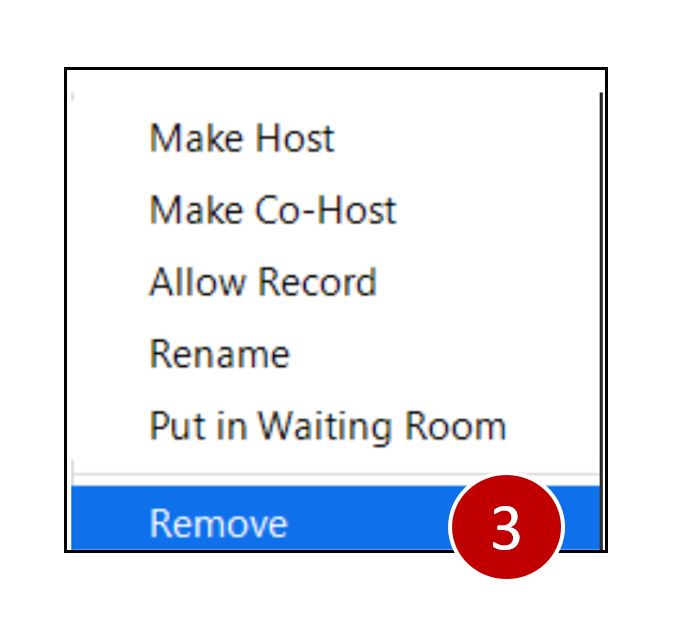
- Click Put in Waiting Room.
- Click Manage Participants.

- If you wish to remove a participant from the meeting.
- Place your mouse over the name of a person and click More.

- Click Remove.

- Place your mouse over the name of a person and click More.
Remove Participants From Class
Follow the instructions to remove a person from a Zoom meeting.
- Click Manage Participants.
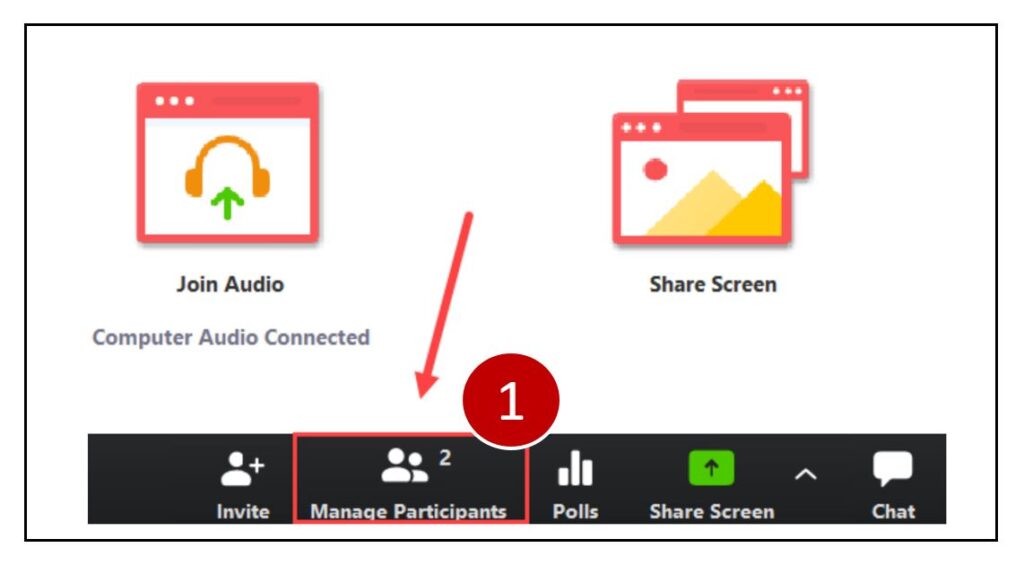
- In the Participants panel, place your mouse over the name of a person and click More.
- Click Remove.
Zoom Meetings Set-up in the Application
Require a Password When Scheduling New Meetings
- Open your zoom application and click on the Schedule icon.
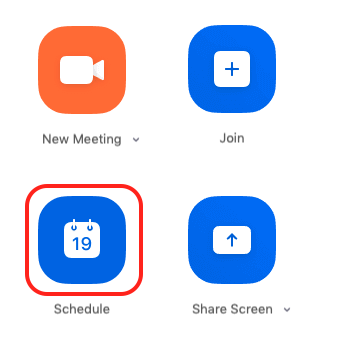
- To set up a password check the box left to Require meeting password.
Require a Password for Instant Meetings
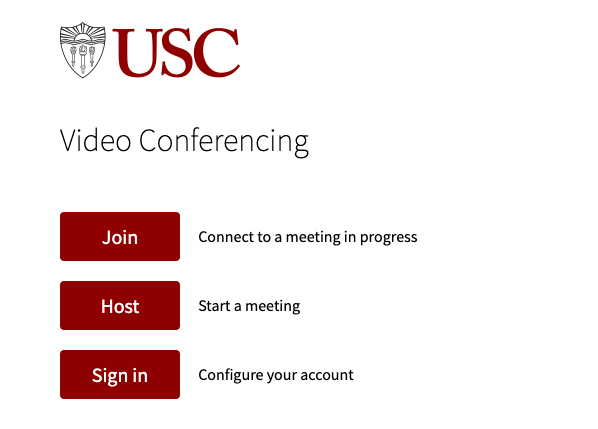
- Go to USC’s Zoom web portal usc.zoom.us.
- Click on Sign In.
- Click on Settings.
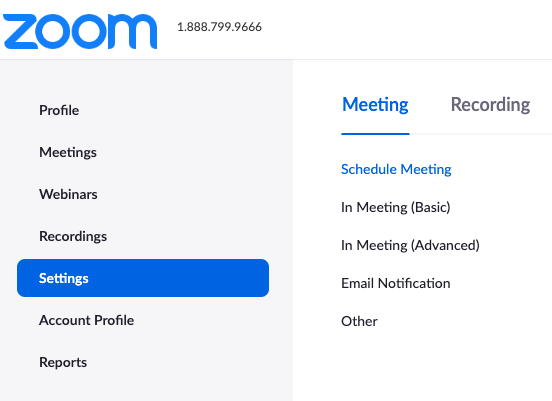
- Navigate to the Meeting tab and scroll down to verify that the password settings that you would like to use for your account are enabled.

- If the setting is disabled, click the Status toggle to enable it. If a verification dialog displays, choose Turn On to verify the change.
Enable a Waiting Room for a Zoom Meeting
The Waiting Room feature allows the host to control when a participant joins the meeting. As the host, you can admit attendees one by one, or hold all attendees in the waiting room and admit them all at once.
Enable Waiting Room
- When scheduling the meeting, click

- Under Advanced Options:
- (a)Select Enable waiting room.
- (b)Ensure Enable join before host is not selected.
- When you have selected all other options, click

Start Meeting with Waiting Room
- Start your meeting from the Zoom app or from the Zoom meeting link in your calendar.
- As participants join the call, you will see a pop-up message:
- (a)To admit a person directly, click Admit and go to Step 7.
- (b)To see all participants in the waiting room, click See waiting room.

- In the waiting room panel, perform one of the following:
- (a)Click Admit All to admit all participants.
- (b)Click Admit to allow a single participant into the meeting.
- (c)Click Remove to remove a single participant from the Zoom meeting.

Managing a Meeting
Once the meeting has started, the meeting room is still active.
- If you wish to return a participant to the meeting room:
- Click More

- Click Put in Waiting Room.
- Click More

- If you wish to remove a participant from the meeting.
- Click More

- Click Remove.
- Click More

Disable “Allow Removed Participants to Rejoin”
- Sign in to the Zoom web portal.
- Click Settings.
- Scroll down and navigate to the Allow removed participants to rejoin option on the “Meeting” tab and verify that the setting is disabled. If the setting is enabled, click the Status toggle to disable it.
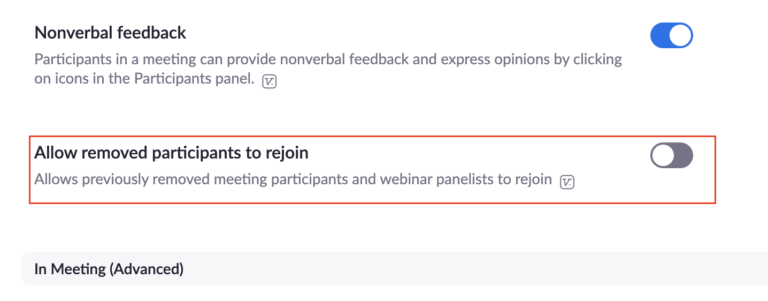
- This will disable removed participants to join the session again so that booted attendees can’t slip back in.
Disable “File Transfer”
To Disable the In-Meeting File Transfer Feature
- Sign in to the Zoom web portal.
- Click Settings.
- Navigate to the File Transfer option on the Meeting tab and verify that the setting is disabled. If the setting is enabled, click the Status toggle to disable it.
Note: If the option is grayed out, it has been locked at either the Group or Account level, and you will need to contact your Zoom administrator.
Limiting the File Types That Can be Shared
For security purposes, the file types/file extensions that can be shared via file transfer can be limited at the account level, by the account owner or an admin on the account.
- Sign into the Zoom web portal as an administrator with the privilege to edit account settings.
- Click Settings.
- Navigate to the File Transfer option.
- Enable Only allow specified file types.
- Enter the allowed file types/extensions, with a comma to separate each extension.
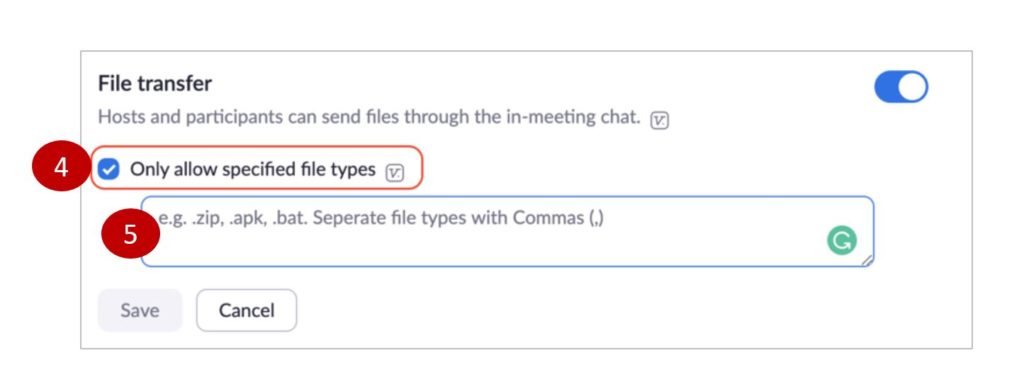
- Click Save.
Zoom Public Meetings
There are two Zoom Public Meeting options: 1) Zoom Webinar and 2) Zoom Meeting. The matrix below provides a high level overview of these options and here is side-by-side comparison to determine the Zoom session that best aligns with your Public Event. Whether you use a Zoom Webinar or Zoom Meeting, there are recommended security settings when conducting a public meeting with Zoom.
What is a Zoom Webinar?
Zoom Webinars are for view-only attendees. They start at a capacity of 100 participants and scale up to 1,000 participants. As the host or a panelist, you can share your screen, video and audio in a webinar and attendees can use the chat or question and answer options to interact with the host and panelists. Webinars can require preregistration, with the option for the host to add custom registration questions, or registration can be turned off for attendees to join by simply clicking a link at the time of the webinar. Webinars can be held once, can reoccur in a series, or can be the same session held multiple times.
How do I get a Zoom Webinar license?
ITS has Webinar licenses available upon request.
How do I keep my Zoom Meetings secure?
There are recommended security settings when conducting a public meeting with Zoom.
Zoom Scheduler for Academic Use
Zoom Scheduler for Professors
Facilitate professors’ scheduling and management of meetings with students. This tool streamlines sharing availability and booking appointments, enhancing academic communication and collaboration.
View this PowerPoint deck for more information: USC Zoom Scheduler