Printable Resources
Overview
Overview
Zoombombing is a new form of trolling in which a participant uses Zoom’s screensharing feature to interrupt and disrupt meetings and classes.
To report any issues of Zoombombing, contact the USC Security Operations Incident Response team at security@usc.edu.
Meetings vs. Webinar Comparison
| Meeting | Webinar | |
|---|---|---|
| Description | Zoom meetings are ideal for hosting more interactive sessions where you’ll want to have lots of audience participation or break your session into smaller groups. | – Think of webinars like a virtual lecture hall or auditorium. – Webinars are ideal for large audiences or events that are open to the public. – Typically, webinar attendees do not interact with one another. – Though Zoom provides options for you to get more social with your attendees, your average webinar has one or a few people speaking to an audience. – Attendees can engage in Q&A and participate in polls. |
| Best Used For | Small to large groups (2+ participants) for: – Team meetings – Working sessions – Training sessions – Educational lectures with high participation – Attendees are known and trusted | Large events and public broadcasts (50+ attendees) such as: – Town halls – Quarterly updates – Educational lectures -Attendees maybe unknown |
Before Class
Zoom Screen Share Settings
Use the recommended screen sharing settings for your Zoom meetings to reduce Zoombombing.
- Sign into usc.zoom.us.
2. Click  .
.
3. Click  .
.
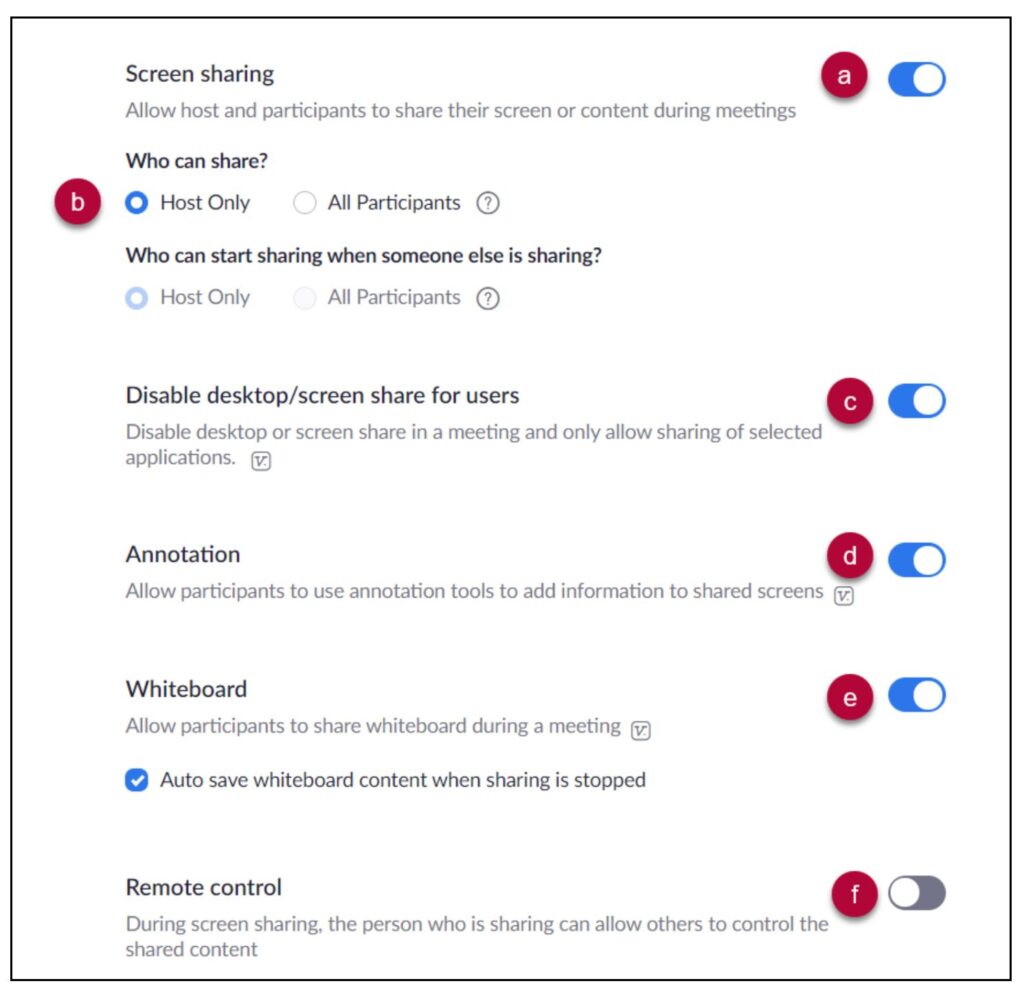
4. Scroll down to the Screen sharing options and make the following selections:
(a) Screen sharing: Activate
(b) Who can share?: Host Only (With this selection you will be able to manually activate screen sharing for participants in a live Zoom call.)
(c) Disable desktop/screen share for users: If you need to allow screen sharing during your Zoom meeting, you can change settings in the live meeting to allow screen sharing.
(d) Annotation: Enable but following these guidelines:
Annotation cannot be activated in a live meeting if it is disabled in Settings
(e) Whiteboard: Enable and select auto save. Follow these guidelines.
Whiteboard cannot be activated in a live meeting if it is disabled in Settings
(f) Disable: Disable
During Class
Remove Participants From Class
Follow the instructions to remove a person from a Zoom meeting.
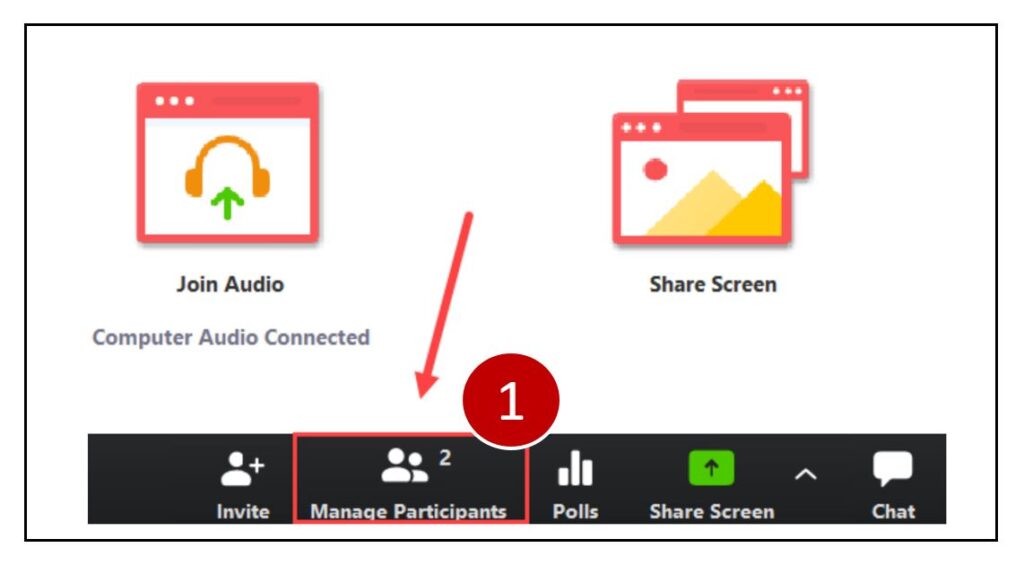
- Click Manage Participants.
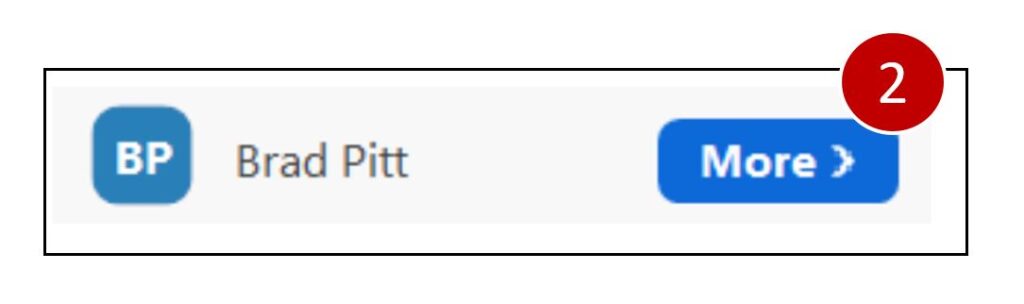
- In the Participants panel, place your mouse over the name of a person and click More.
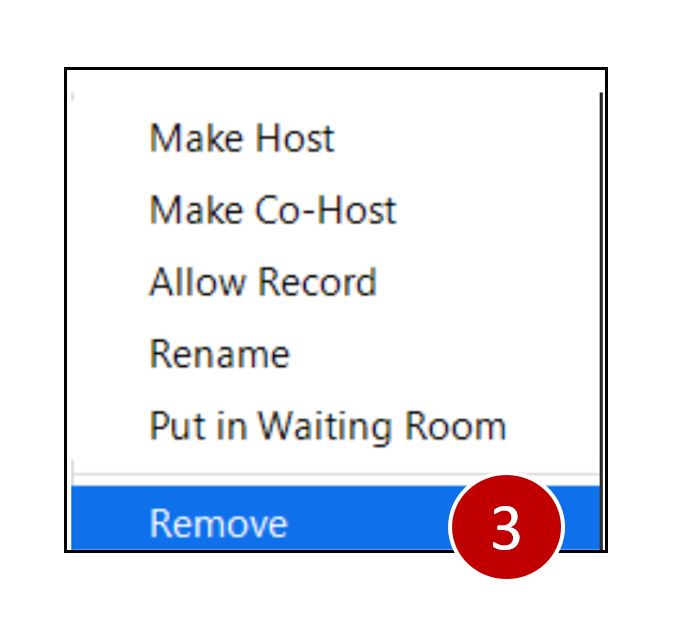
- Click Remove.
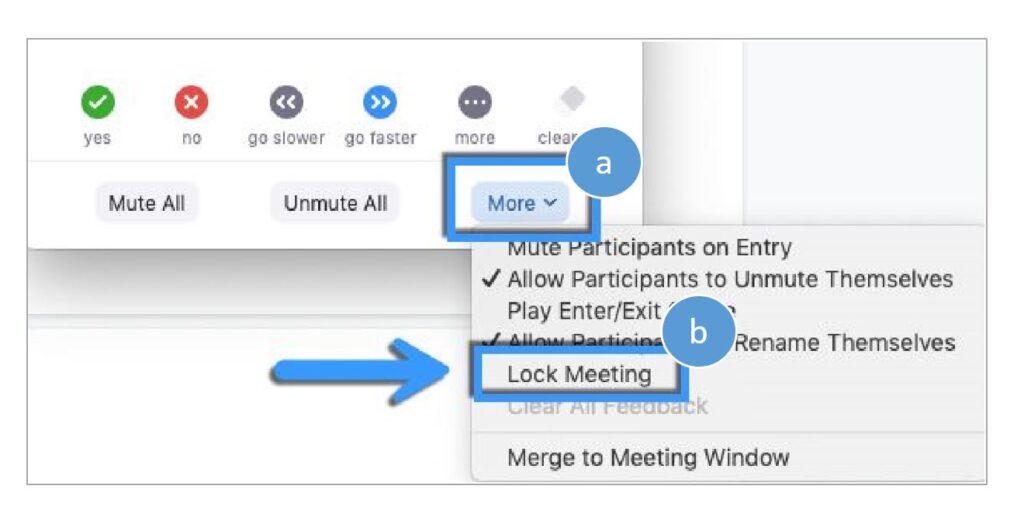
Lock a Meeting
When you lock your meeting, no additional participants are able to enter your class.
1. While in meeting session, click ‘Participants’ at the bottom of your Zoom window.

2. In the participants’ pop-up box, select (a) More and (b) Lock Meeting. When the meeting is locked, no new participants can join, even if they have the meeting ID and password.
Enable Screen Share for Participants in a Zoom Meeting
Follow the steps to allow participants to share their screen in a Zoom meeting when your default setting for participant screen sharing is disabled.
- Start you Zoom meeting in the Zoom app.
- Allow authorized participants into the meeting from the waiting room.
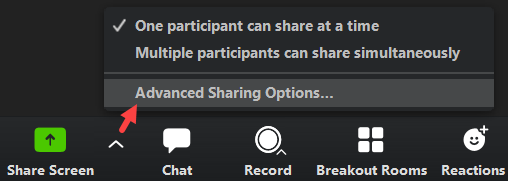
- Place your mouse in the Zoom meeting window. A bar will appear.
- Next to Share Screen, click
 -> Advanced Sharing Options….
- On the pop-up screen, perform the following:
- (a) Select One participant can share at a time.
- (b) Select All Participants.
- (c) Select Only Host.
- (d) Click
 .
.
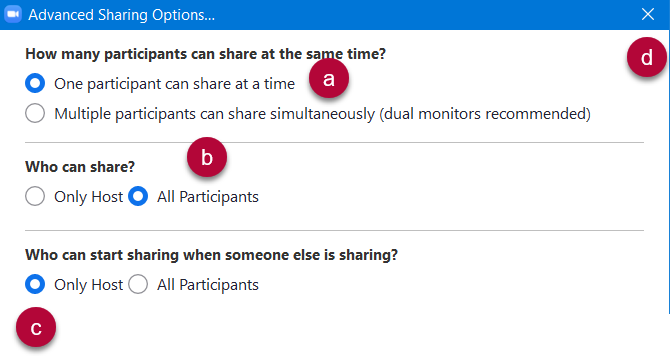
- Your participants will now be able to share their screens. As the host, you will be the only participant in the meeting who can start sharing while another person is sharing.
Disable Chat in a Zoom Meeting
Follow the instructions to disable chat in a zoom meeting.
1. In the Zoom meeting window, click Chat.

2. In the Chat panel, click ![]() .
.
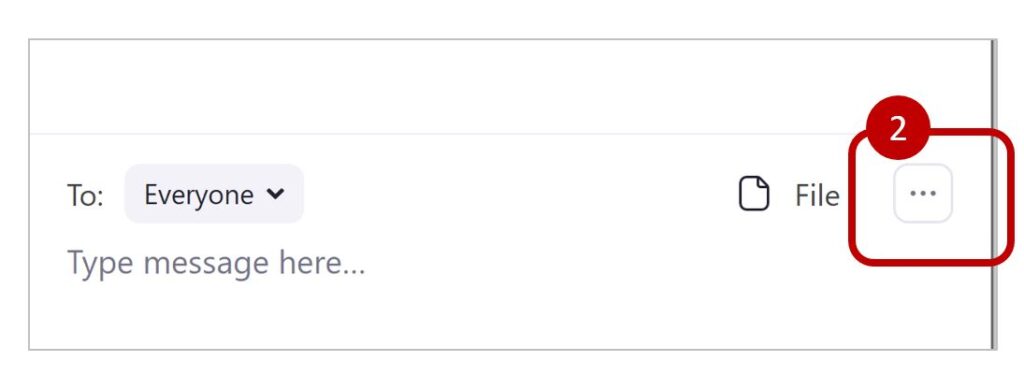
3. In the pop-up window, click No One to prevent participants from chatting in the meeting.
