Basic Editing of Zoom Cloud Recordings
The instructions below provide a step-by-step overview of how to trim the beginning and end of your Zoom recordings.
- Log into your Zoom account at https://usc.zoom.us/recording
- Select Cloud Recordings
- Click the meeting topic for the session that you want to play, then click the thumbnail of the video.
- A new browser tab opens, showing the recording playback and the available controls.
- Click Set Playback Range.
6. Use the sliders to specify the start time and the end time for the recording, then click Save.

7. Once your edited video is saved, it will be available in Blackboard for students to view.
Attendance Reporting
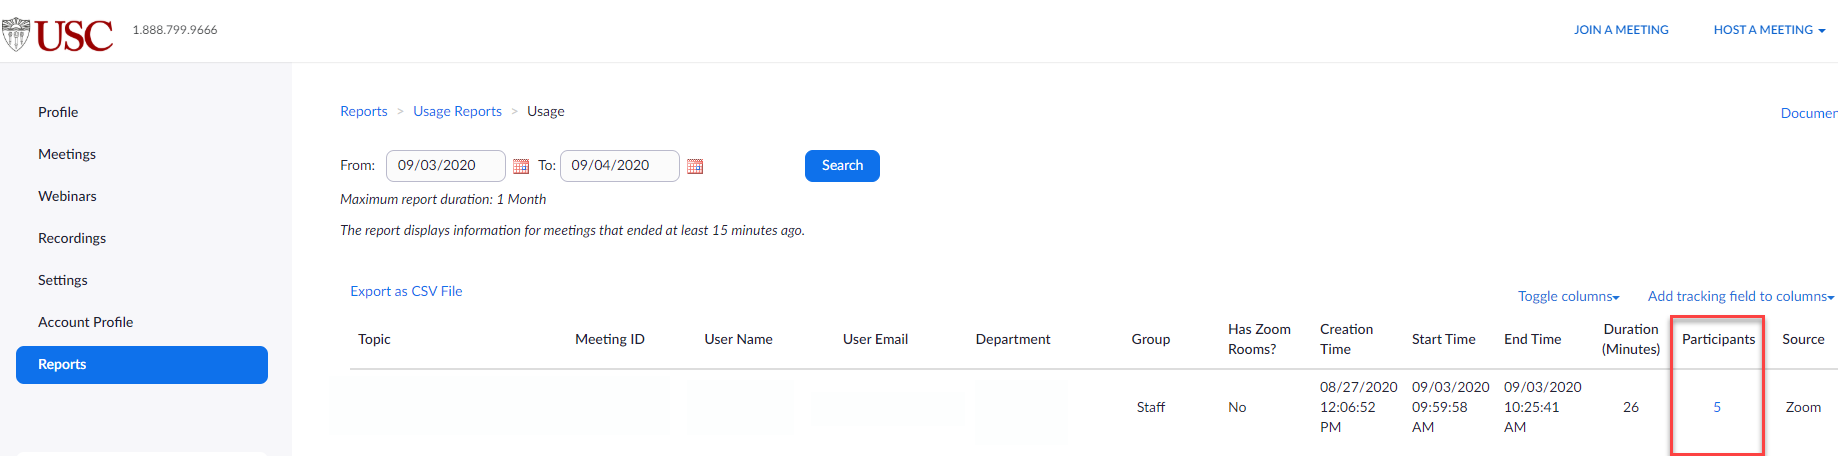
Zoom can create a report showing who attended a particular Zoom meeting, but that report is hidden.
- Go to https://usc.zoom.us/account/my/report.
- Search for a meeting within a one-month window.
- Click on that meeting’s number of participants in the “Participants” column.”
Automatic Zoom Recording Functionality for Teaching on Campus
Learn how to record Zoom meetings automatically through Blackboard.
Zoom Transcription Service
Generating a Transcript
- Start a meeting or webinar.
- Click the Record button and choose Record to the Cloud.
- After the meeting ends, you will receive an email that lets you know that your cloud recording is available. A short time later, you also receive a separate email letting you know that the audio transcript for the recording is available. These emails include links to view your recordings and transcript.
Viewing and Editing the Transcript
- Click the link in the email OR navigate to the My Recordings page on the Zoom web portal and click the name of the recorded meeting.
Notes:- This opens the Recording Details page, which includes at least two files:
- Audio Only (m4a)
- Transcript Recording (vtt)
- If you selected other files for the cloud recording, these will also be included:
- Recording (mp4)
- Gallery view (mp4)
- Chat text (txt)
- This opens the Recording Details page, which includes at least two files:
- Click the Audio Only m4a file, or the Recording or Gallery View mp4 file, if available. The text of the transcript displays on the right-hand side of the file.
- Navigate to the Audio Transcript panel on the right and click the pencil icon next to the phrase you want to edit.
- Make any changes to the text, then click Save.
The updated version of the text is displayed when you play the audio or video file.
Embedding the Transcript
The transcript is automatically embedded within the audio and video file, but is hidden by default. To see the transcript embedded in the audio or video file:
- Open the audio or video file from My Recordings.
- Click

- Click the CC icon at the bottom right of the screen.
Note: The text displays on top of the video, similar to closed captioning.
Searching within the Transcript
- Go to My Recordings.
- In the Search by list, choose Keyword.
- Type a word or phrase in the text entry box, then click Search.
Note:This shows the list of meetings that includes the keyword in the transcript. - Click the applicable meeting to view the transcript.
- Click the Audio Only m4a file, or the Recording or Gallery View mp4 file, if available. The text of the transcript displays on the right-hand side of the file.
- Navigate to the Audio Transcript panel on the right and type the keyword into the search box at the top. All instances of the keyword are highlighted.
Using post-meeting survey and reporting
Zoom offers various types of surveys that can be particularly useful in educational settings. These tools help educators gather feedback, assess student comprehension, and engage students interactively. Here’s a brief overview and steps on how to use them:
Types of Surveys and Polls in Zoom for Education:
- Single Choice: Participants select one answer from multiple options.
- Multiple Choice: Participants can select more than one answer.
- Short Answer: Participants provide a brief written response.
- Long Answer: Participants provide a more detailed written response.
- Matching: Participants match items from two lists.
- Rank Order: Participants rank items in a specific order.
- Rating Scale: Participants rate items on a scale (e.g., 1 to 5).
- Fill in the Blank: Participants complete a sentence or phrase
Zoom support article: Using post-meeting survey and reporting
Zoom support article: Understanding question types for surveys, polls, and quizzes
Steps to Create and Use Surveys in Zoom
- Create a Survey:
- Navigate to Surveys in the Zoom web portal. https://usc.zoom.us/user/survey
- Click + Create and select Survey.
- Enter a survey name and description.
- Add questions by selecting the question type and entering the content. Customize options like required responses and anonymity as needed
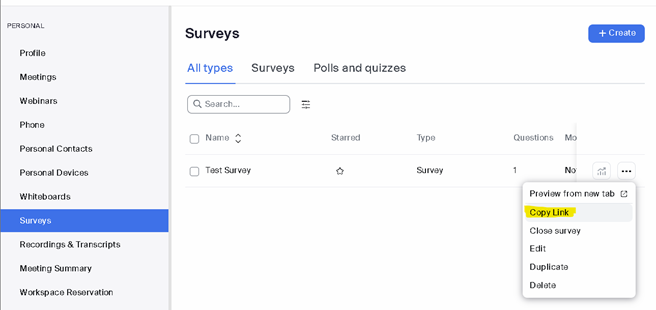
- You can copy the URL link for the survey and share it with participants to ensure they can access it directly.
- Assign the Survey:
- Navigate to Meetings:
- Click on the Meetings tab in the navigation menu. https://usc.zoom.us/meeting#/upcoming
- Select the Meeting:
- Click on the name of the meeting you want to add the survey to. If you haven’t scheduled the meeting yet, click Schedule a Meeting and configure the meeting settings, then click Save.
- Access the Survey Tab:
- For an existing meeting, click the Survey tab.
- For a new meeting, after saving, click the Survey tab.
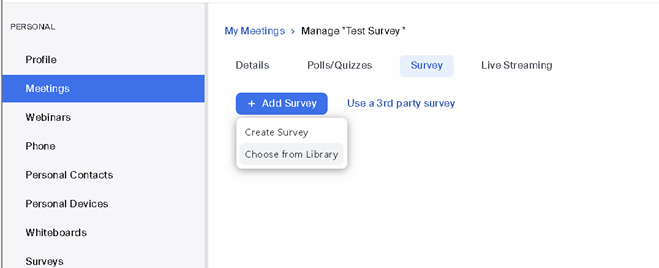
- Add Your Survey:
- Click + Add Survey.
- Choose Create Survey to build a new survey or Choose from Library to select an existing one from your survey library.
- Navigate to Meetings:
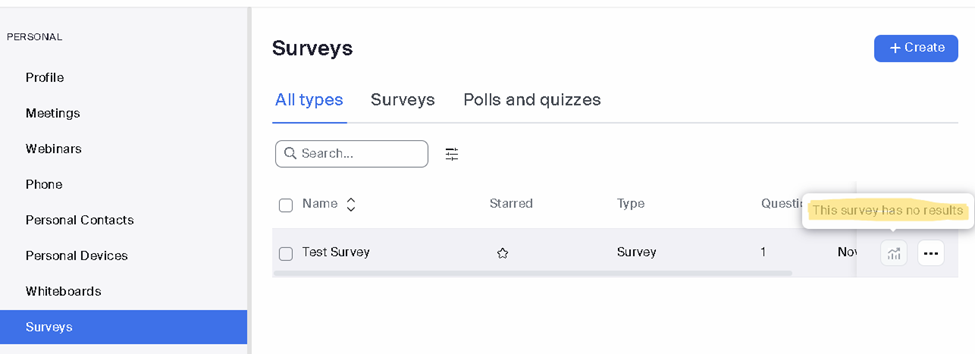
- View and Analyze Results:
- After the meeting, access survey results through the Zoom web portal under Surveys > Survey Results button.
- Download and analyze the feedback to improve future sessions.